
In this post, I’ll explain how to connect an existing Visual Studio project to Github for the first time, along with push/pull code from Github.
Step 1
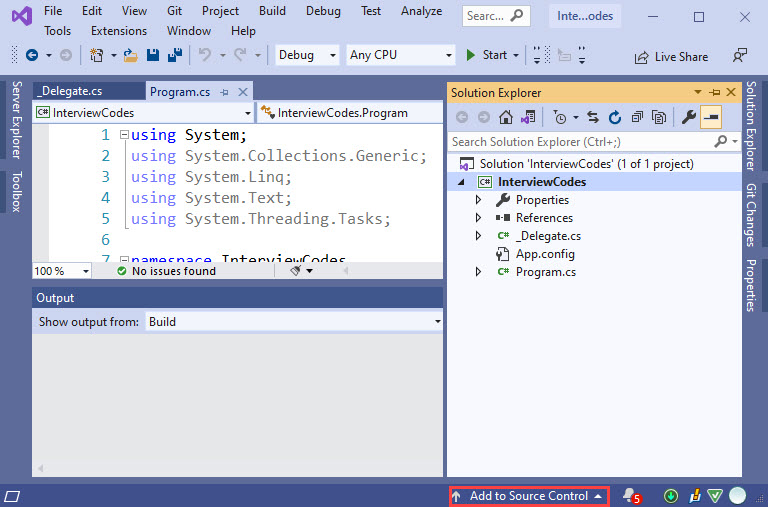
Assuming the project is checked and ready, click on “Add to Source Control” on the lower right side of Visual Studio. In previous versions of VS, it could be located under the file menu or by right-clicking on the solution.
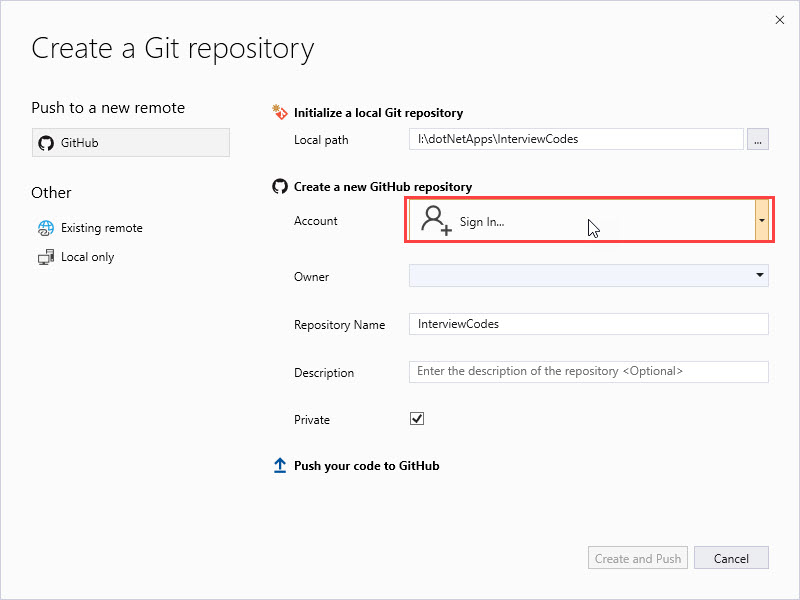
After clicking on “Add to source Control -> Git”, you should see the following screen. Click on “Sign in” and it will redirect to Github login page. Once logged in and authorized, you should get back to the setup screen again.
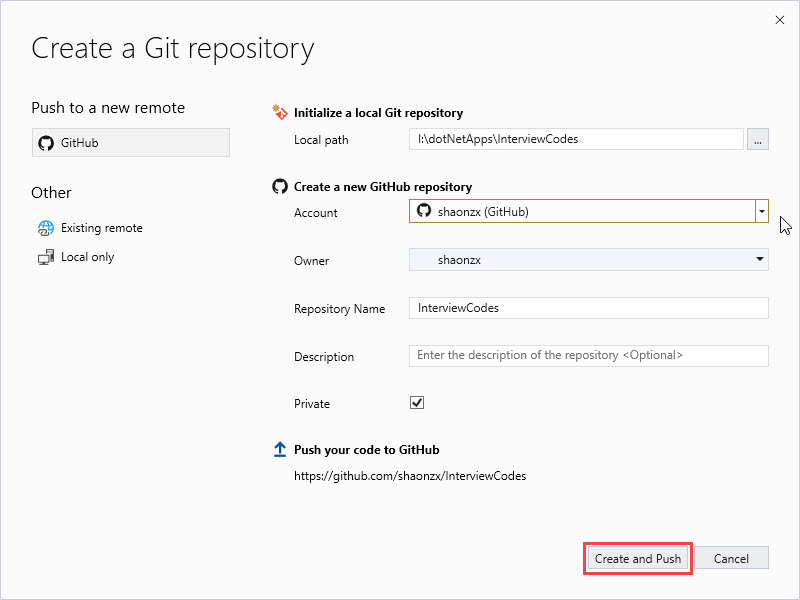
Fill the other parameters and finally hit “Create and Push” button.
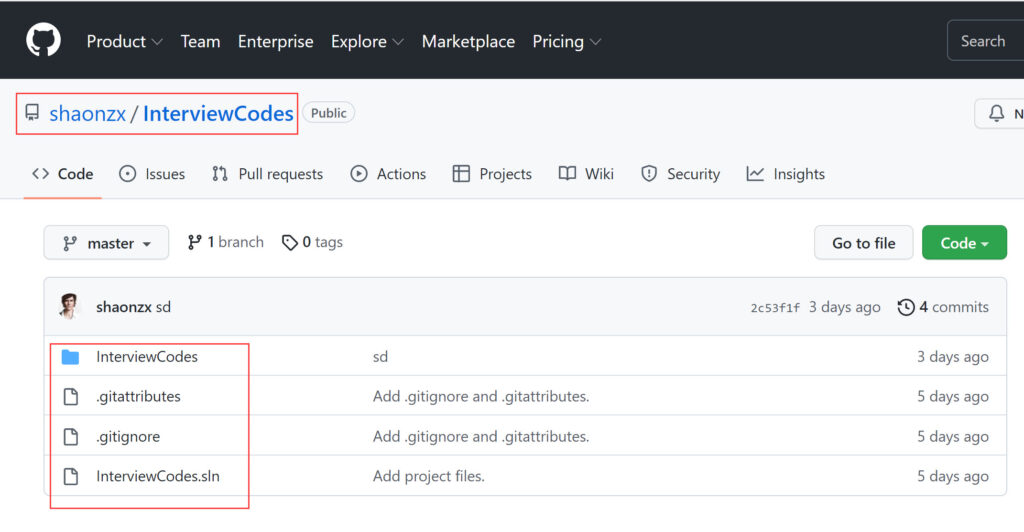
After clicking on publish, it’ll take a little bit of time. After finishing, it will show you the message, “Repository Created Successfully”. Now you can see your project on GitHub. Open your GitHub account and check all the code uploaded with the project name Repository.
Step 2
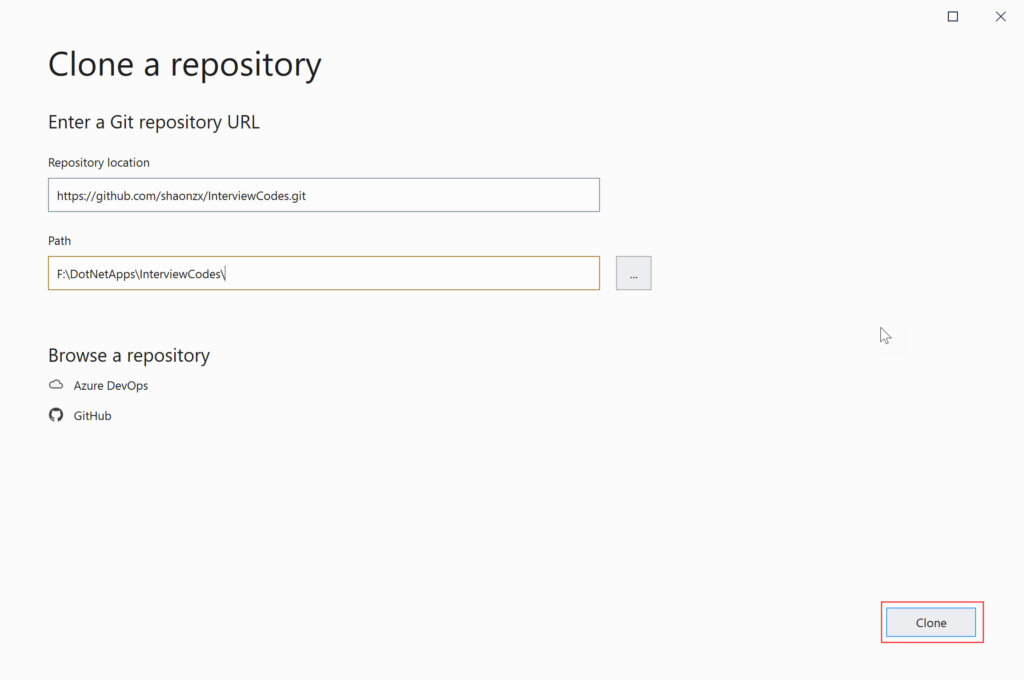
Now that the code is published to Github, you might want to use it on a different machine. Open Visual Studio and navigate to Git -> Clone.

In the following screen, enter your repository link and local path where you with to clone the project.
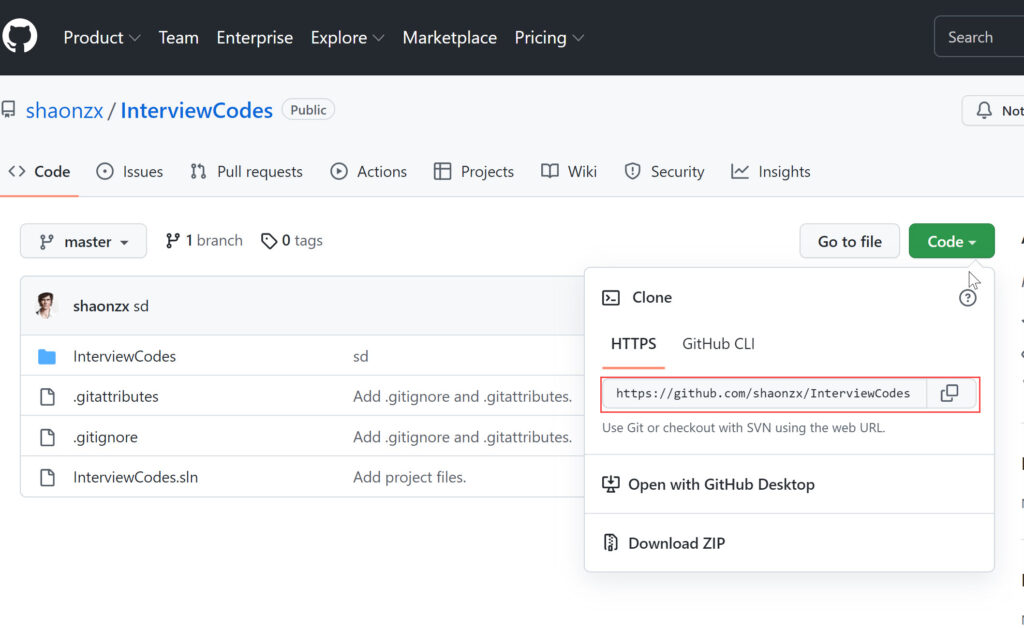
You’ll find the repository link on Github, under the Code menu.
Finally, press Clone, and the solution should be downloaded in a few moments.